Cisco NDFC VXLAN EVPN fabric, step by step (part 2 of 3)

Create the fabric, discover the switches, pair the leaves, add a VRF and networks, attach the host ports, and prove it with a ping matrix. One NDFC screen at a time.
Banner: cisco ndfc vxlan evpn fabric, step by step

On this page

Six switches sit on the management segment with a hostname, an admin user and nothing else. Two application subnets are waiting, one for web servers and one for app servers, and every server is cabled to two leaves. The ask is the usual one: make them reachable, across the fabric, tonight. This part does it in the NDFC GUI, one screen at a time, from Create fabric to a ping matrix. Part 3 does the same build with Ansible.

I captured the NDFC pages below on my lab controller at 192.168.1.232, a second Nexus Dashboard node in the same lab that runs 4.1(1g) and was deployed the same way as Part 1. Menu names and form fields are quoted from that release. The cluster you built in Part 1 starts from the same place, Manage > Fabrics.

Create a Fabric

Log in to Nexus Dashboard. Click Manage, then click Fabrics in the panel that slides out.
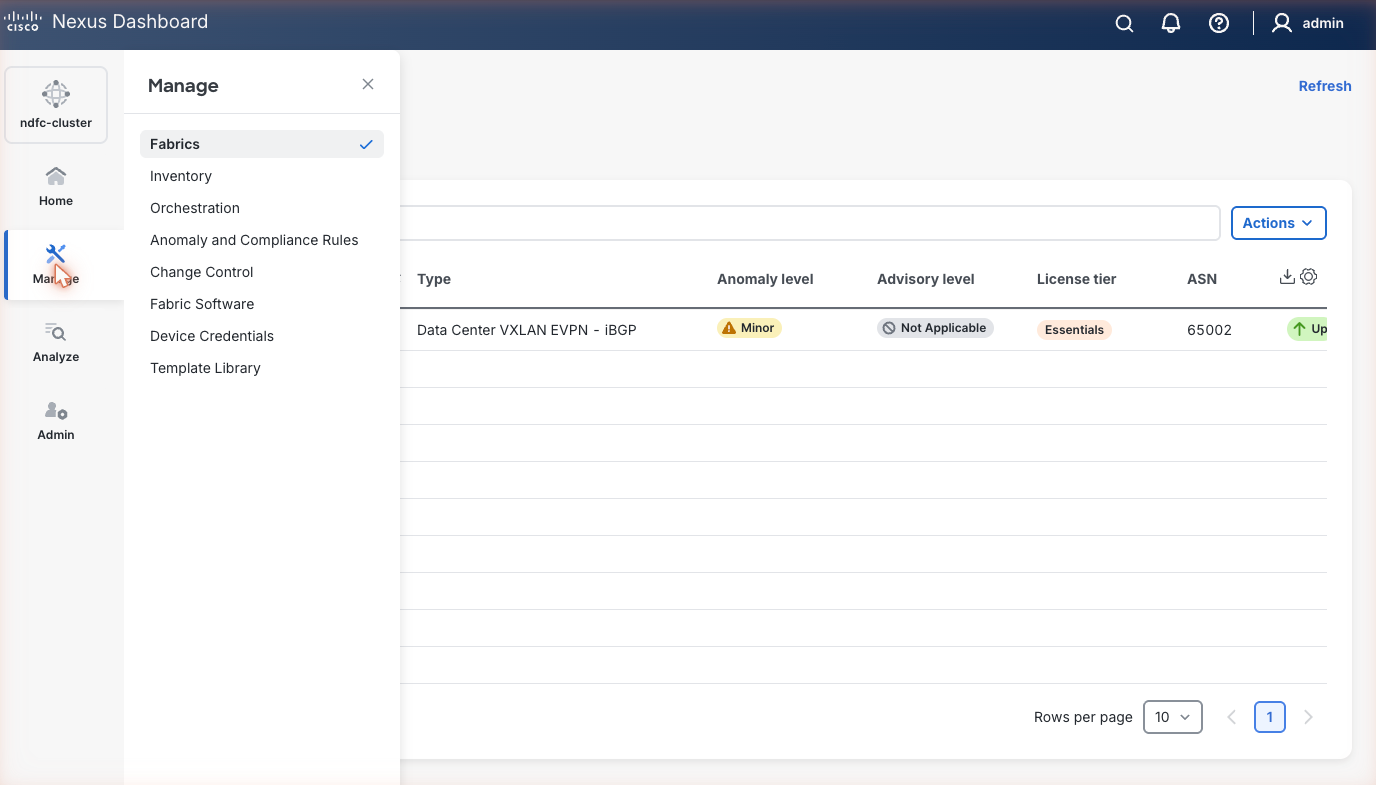
Nexus Dashboard with the Manage navigation panel open, listing Fabrics, Inventory, Orchestration, Anomaly and Compliance Rules, Change Control, Fabric Software, Device Credentials and Template Library.
The Manage panel. Fabrics and Device Credentials are the two entries you will keep coming back to.

On a fresh cluster the Fabrics page is empty.
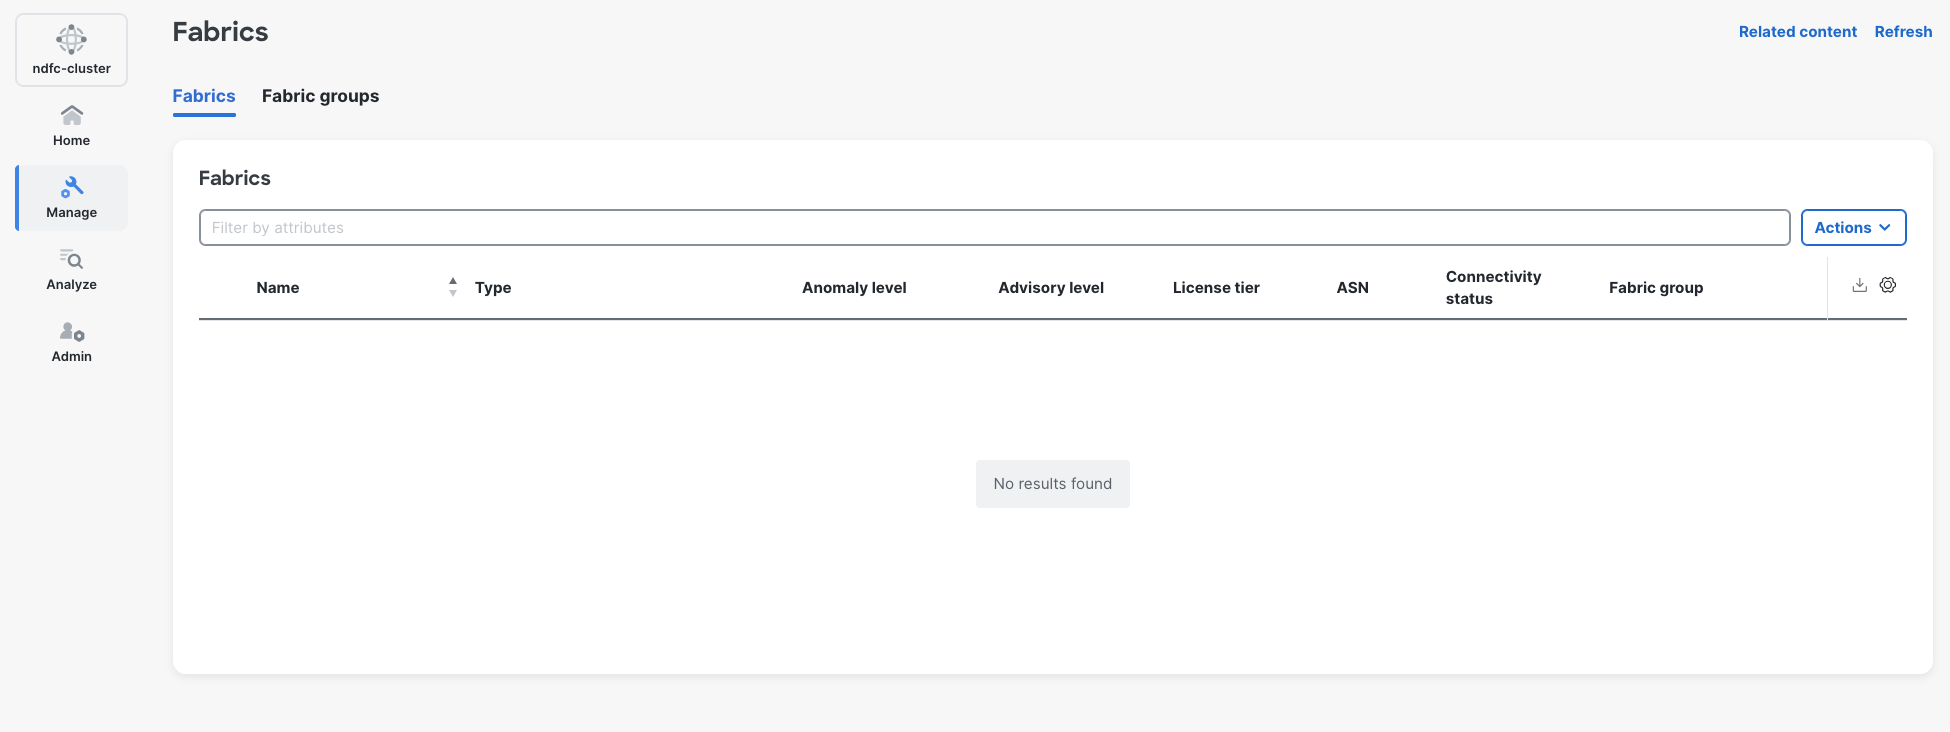
Manage, Fabrics page showing No results found.
The Fabrics page on the Part 1 cluster, before any fabric exists.

Open the Actions menu at the top right of the table and choose Create fabric.
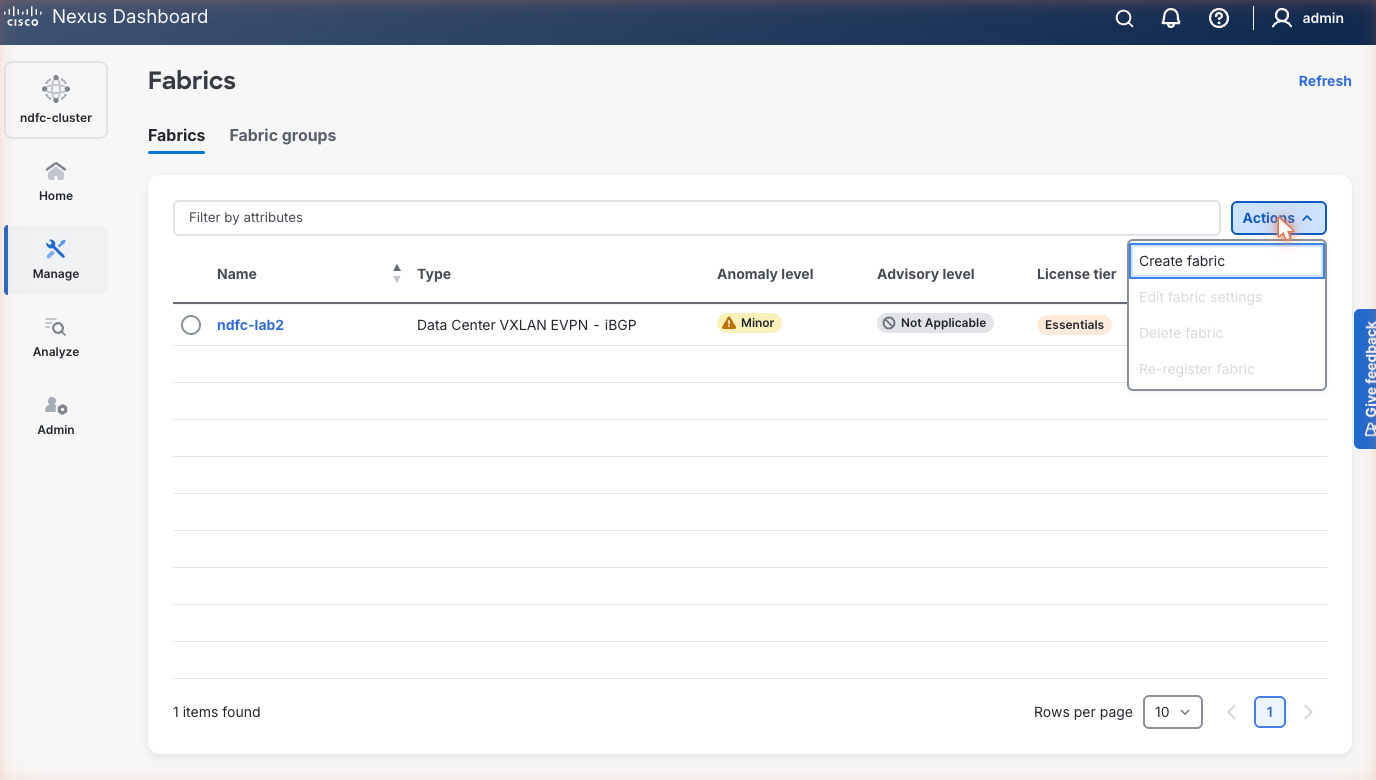
Fabrics page with the Actions menu open and Create fabric highlighted; the table already lists ndfc-lab2.
Create fabric under Actions. My controller already lists ndfc-lab2 because I took this screen after the build; the menu looks the same over an empty table.

Click the Create new LAN fabric tile, then Next.
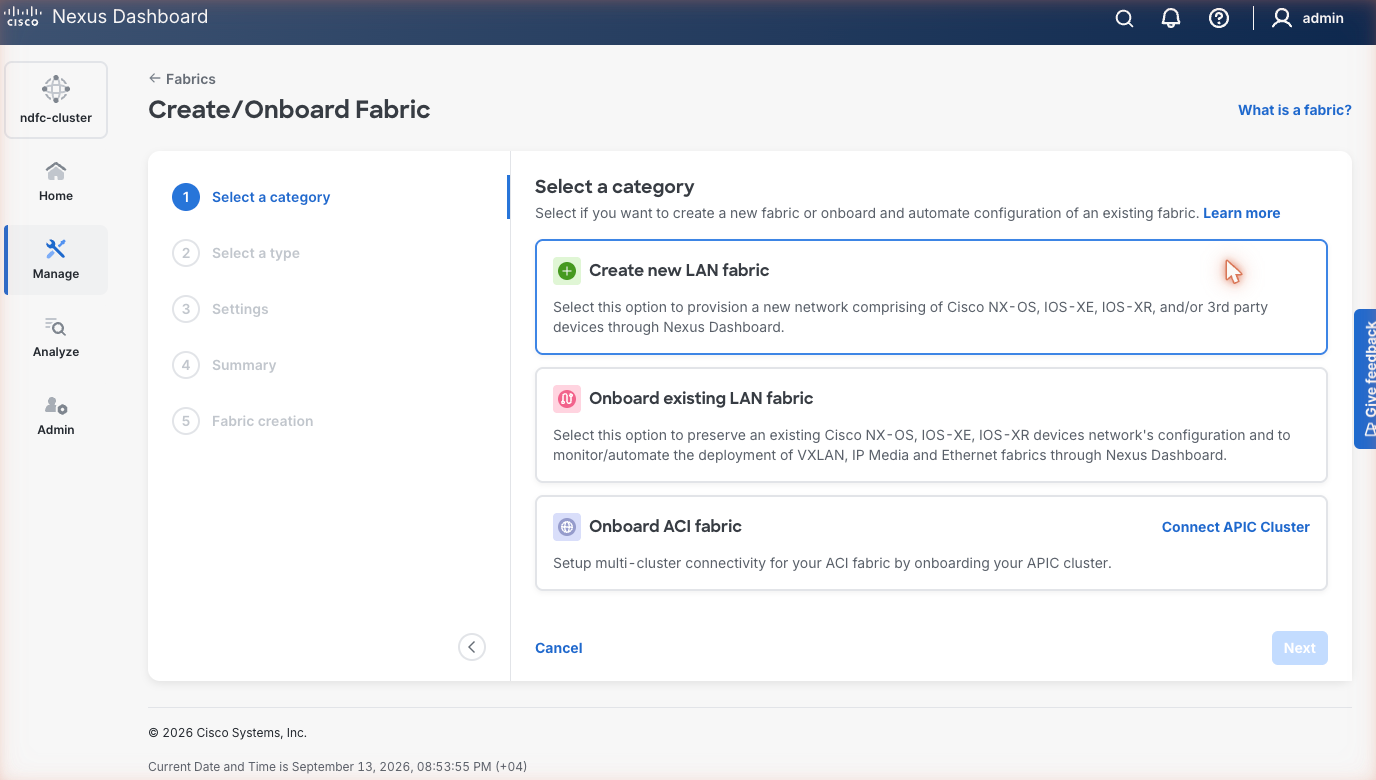
Create/Onboard Fabric wizard, Select a category: Create new LAN fabric selected, with Onboard existing LAN fabric and Onboard ACI fabric as the other tiles.
Step 1 of the wizard. The second tile, Onboard existing LAN fabric, is for switches whose configuration you want to keep, which is not this lab.

Click the VXLAN tile, leave Data Center VXLAN EVPN selected as the fabric type, and click Next.
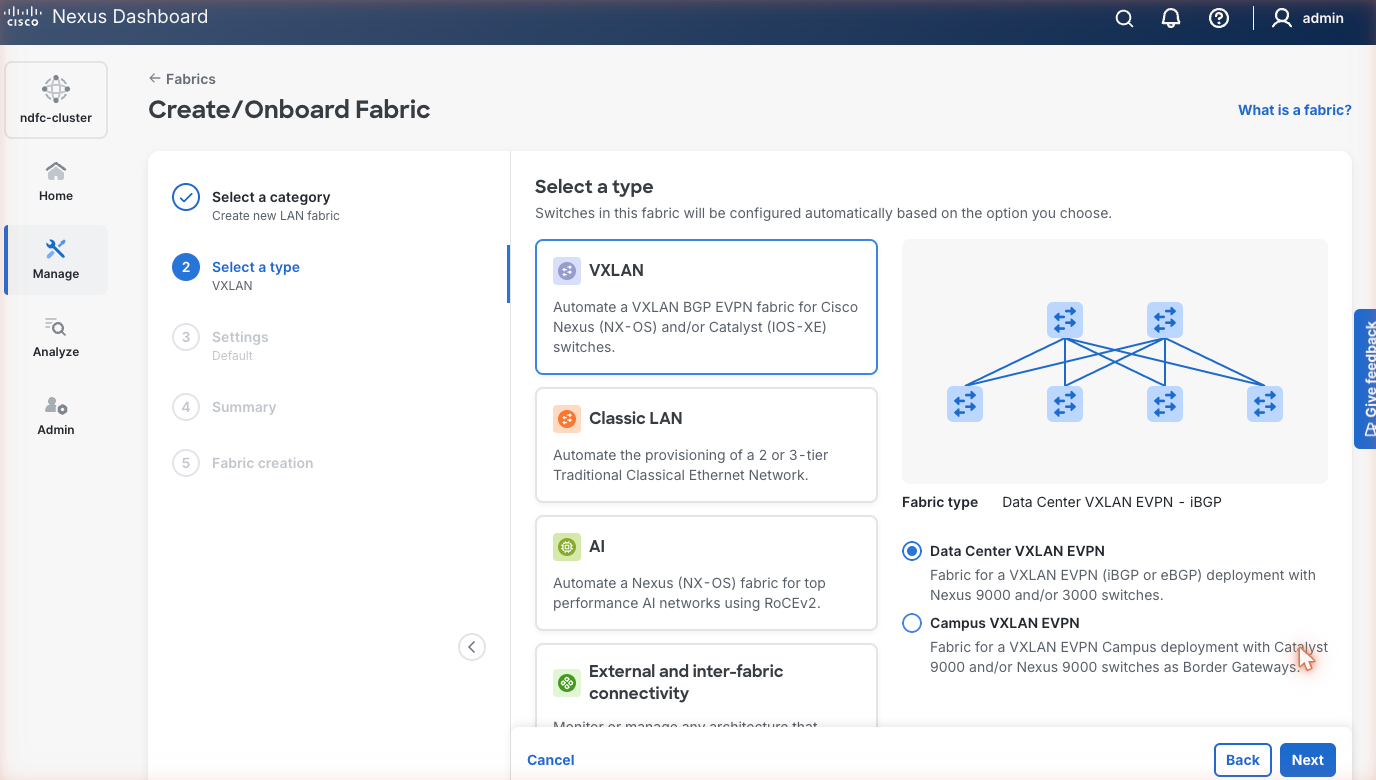
Create/Onboard Fabric wizard, Select a type: VXLAN tile selected, fabric type Data Center VXLAN EVPN with iBGP, Campus VXLAN EVPN as the alternative.
Data Center VXLAN EVPN with iBGP.

This post is for paying subscribers only

Subscribe to LevelUp I.T. newsletter and stay updated.

Don't miss anything. Get all the latest posts delivered straight to your inbox. It's free!
Great! Check your inbox and click the link to confirm your subscription.
Error! Please enter a valid email address!